
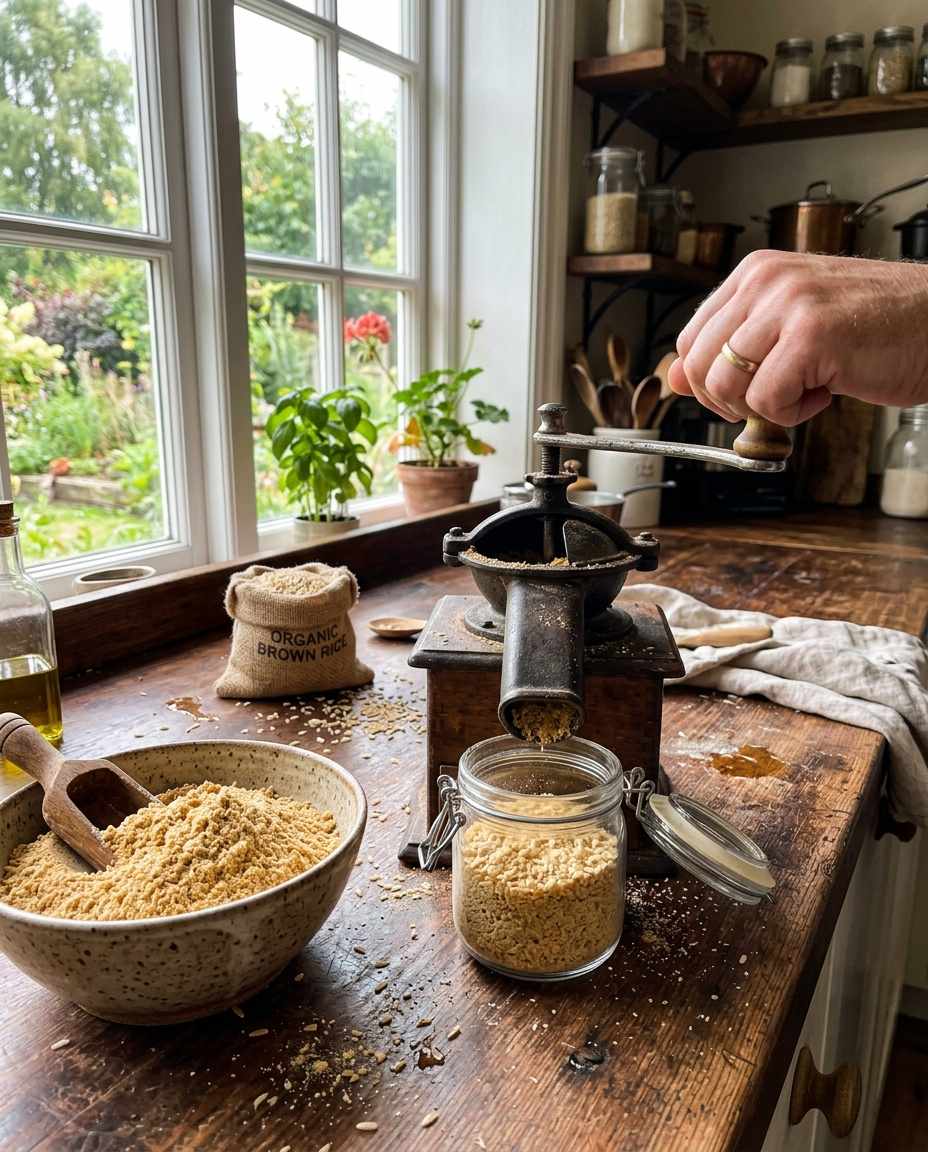
I remember the first time I ground my own brown rice flour in my cramped kitchen, the earthy smell of freshly milled grains filling the air.
The texture was far from the store-bought stuff, richer and full of character.
Making brown rice flour at home elevates your cooking, offering unmatched freshness and control over your ingredient’s quality.
Selecting the Right Brown Rice Variety
Choosing the appropriate type of brown rice sets the foundation for the quality of your homemade flour.
Short-grain brown rice tends to mill down finer thanks to its higher starch content, resulting in a softer end product ideal for baked goods.
Long-grain varieties produce a grittier texture more suited to coarser applications like batters.
I once used jasmine brown rice and ended up with a slightly sticky flour due to its aromatic oils, which can affect drying times.
When shopping, look for fresh rice from reputable suppliers; stale or rancid rice due to improper storage will impart off-flavors.
Organic rice is preferable because it avoids contaminants that may not be removed during flour processing.
A common oversight is assuming all brown rice is equal — even differences in harvest year can affect taste and texture, so test small batches first.
In my experience, soaking brown rice before drying and grinding helps reduce milling stress and creates a milder flour taste.
If you prefer no soaking, use freshly rinsed and dried rice to avoid residual moisture, which leads to clumping.
Keep rice moisture content around 12 percent for optimal milling performance.
Your takeaway is to source high-quality, fresh short- or medium-grain brown rice, ideally organic, and test small batches.
Document moisture content and grain origin to refine your flour profile over time.
This initial care pays dividends in flavor and texture consistency.
Optimal Preparation: Soaking and Drying Techniques
Preparing brown rice before grinding influences both milling efficiency and final flour quality.
I typically soak rice for 30 to 60 minutes in filtered water to soften the bran layer, which lowers milling resistance and reduces flour heat buildup.
This process prevents starch gelatinization, so the rice dries back to a hard texture without turning pasty.
After soaking, spreading the rice evenly on a thin cotton towel and drying it in ambient air for 6 to 8 hours is key.
I’ve found using a food dehydrator set at 115°F expedites this step without risking overheating the rice, which would discolor the flour and affect taste.
The goal is to return moisture to approximately 12 percent, optimal for milling.
A frequent mistake is drying rice inadequately, which causes clumping during milling and uneven granulation.
Over-soaking or using warm water above 80°F can activate enzymes that alter rice chemistry, giving bitterness.
Always check dryness by biting a kernel: it should be firm but not brittle.
Your action plan is to experiment with soaking times between 15 minutes and 1 hour, then dry thoroughly at low temperature, avoiding direct sunlight to preserve color.
Consistent moisture level ensures finer, uniform flour and prolonged shelf life.
Choosing and Using Milling Equipment

Grinding brown rice flour at home is a transformative experience, but your choice of milling equipment dramatically affects texture, efficiency, and flavor.
I tested a range of devices from high-powered blade mills to stone burr grain mills.
Blade mills like blender models generate heat quickly, risking starch damage and coarser flour, while stone burr mills ensure a cool grind and uniform particle size.
For small batch production (under 2 cups), a heavy-duty burr mill such as the NutriMill or WonderMill offers consistent results with minimal heat buildup, preserving the rice’s natural oils.
I avoid coffee grinders for this task because they trap residual flavors and require frequent cleaning to avoid contamination.
Common error is forcing too much rice at once in small devices, leading to uneven grinding and flour with hot spots that start oxidizing.
It’s better to process in small batches – about ¼ cup at a time – with intermittent pauses to allow cooling.
Key takeaway: invest in a high-quality stone burr mill optimized for grains, choose batch sizes that your equipment can cool properly, and clean thoroughly after each use to maintain flavor purity.
This is the difference between scratchy coarse flour and silky home-milled perfection.
Achieving Consistent Particle Size and Texture
Achieving an even particle size in brown rice flour is critical for predictable baking and cooking outcomes.
Through trial, I found a mesh size of roughly 80 to 100 microns yields a balance between fine powder and retained bran texture, ideal for gluten-free breads and pastries.
Too coarse flour generates gritty textures, while overly fine flour can become gluey when hydrated.
After milling, sifting flour through a fine stainless steel sieve removes oversized bran particles that disrupt dough integrity.
I suggest using a 60-mesh sieve (around 250 microns) to trap coarse bits, rerunning them through the mill.
This two-step method enables customization of flour texture for different culinary projects.
Inconsistent grind is a frequent pitfall when milling in single long sessions, causing heat buildup and clumping.
A practical tip is to mill in multiple short bursts while stirring the grain bed gently between passes to expose untapped kernels.
Your best practice is to invest in a good quality sifter and adopt a rhythm of milling, sifting, and remilling coarse fractions.
Keep notes on particle size distribution related to recipe performance, tuning your process as you go.
Storage and Shelf Life Considerations
Homemade brown rice flour’s freshness is its strongest asset but also a significant vulnerability due to its higher oil content from the bran layer.
I learned that to maintain flavor and prevent rancidity, flour should be stored in airtight, opaque containers away from heat and light.
Glass jars with silicone seals are ideal but secondary sealed plastic bags inside containers add barrier protection.
Refrigeration extends shelf life significantly, especially in humid climates, slowing lipid oxidation and microbial growth.
I store my batches at 40°F and note that flour remains vibrant for up to six months.
However, flour must be brought to room temperature before use to avoid moisture condensation, which triggers clumping.
Mistakes often occur in storing homemade flour alongside strong-smelling foods, as rice flour easily absorbs odors.
Also, some neglect proper sealing, leading to insect infestation or stale flavors.
Actionable advice: transfer your batch into 16-ounce glass jars with airtight silicone-lined lids, store in a cool dark cupboard or fridge, and batch-label jars with milling date.
Rotate your flour stock and always use within 3 to 6 months for best results.
Flavor Profiles and Culinary Applications
Freshly milled brown rice flour has a nuanced, nutty flavor with subtle sweetness and a touch of earthiness that commercial flours lack.
This complexity lends a vibrant character to gluten-free baked goods, pancakes, and thickening sauces.
When I substituted store-bought rice flour with homemade, my almond cookies gained a crisp exterior and tender crumb.
Brown rice flour absorbs liquids differently than white rice flour due to retained bran oils and fiber, impacting dough hydration.
I recommend increasing liquid content by 5 to 10 percent in your recipes, adjusting based on texture during mixing.
Trial batches are crucial when converting recipes.
A common error is using homemade brown rice flour interchangeably without adapting liquid ratios, which can yield dry or dense results.
Texture also varies with grind fineness, influencing crumb softness.
The takeaway is to experiment slowly, tweaking hydration and testing flour on small recipe batches.
Embrace the flavor differences as an asset for unique, wholesome dishes rather than expecting a direct white rice flour substitute.
Troubleshooting Common Homemade Flour Challenges
One of the most frequent challenges I encountered was clumping during milling, often caused by residual moisture or overheating.
Excess moisture in rice causes particles to stick together mid-grind, while heat accelerates the breakdown of starches, making flour pasty.
Using intermittent grinding bursts and ensuring proper drying mitigates this issue.
Another problem is rancid or off-flavors developing over time due to oxidation of the natural oils in brown rice bran.
This occurs especially if flour is stored improperly or kept for too long.
Smell tests before use are essential; fresh flour should smell slightly sweet and nutty, never sour or musty.
Sometimes, the flour turns out too coarse or inconsistent, mainly when using low-power grind equipment or overloading the grinder.
This affects baking results and mouthfeel.
Accept that some mill models are not designed for fine rice flour and adjust expectations or equipment accordingly.
Your troubleshooting playbook involves checking moisture content prior to milling, milling in short cycles to avoid heat, storing flour airtight refrigerated, and rejecting flour with off aromas.
Also, be ready to adjust recipe hydration if particle size varies.
Scaling Up: From Kitchen to Small-Batch Production
Scaling homemade brown rice flour from personal use to small-batch production introduces new variables, especially around throughput and consistency.
While home burr mills excel up to ½ pound per batch, larger output benefits from dedicated grain mills with variable speed control and cooling systems to prevent heat-induced flavor shifts.
In my small-batch setup, I installed a bench grinder with adjustable gap plates and intermittent water cooling sprays between milling loads to maintain quality.
Batch blending afterward ensures even particle size and flavor uniformity.
It’s critical to analyze moisture content for all input rice, as even slight variation across source lots impacts final flour characteristics.
A typical mistake in scaling is neglecting cleaning protocols, which leads to flavor carryover and contamination across batches.
I maintain rigorous equipment sanitation routines, including brushing and vacuuming between runs.
Action steps for scaling include investing in customizable milling equipment with temperature control, setting up a sanitation protocol, batching input grain for moisture uniformity, and documenting each production run for continuous improvement.




Leave a Reply